Are you a mushroom enthusiast looking to cultivate your own fungi at home but don’t have a pressure cooker for sterilizing the substrate? Fear not, because in this article, we’ll explore alternative methods for effectively sterilizing mushroom substrate without the need for specialized equipment. Whether you’re a seasoned mycologist or just starting out on your mushroom-growing journey, this guide will provide you with valuable insights and practical tips to ensure successful cultivation without the use of a pressure cooker.
If you’re a budding mushroom farmer, you know the importance of sterilizing mushroom substrate. Unfortunately, you don’t have the luxury of having a pressure cooker. No worries! We’ve got the secret to how to sterilize mushroom substrate without a pressure cooker.
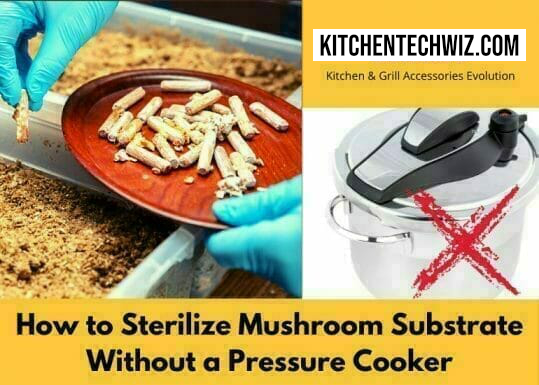
How to sterilize mushroom substrate without a pressure cooker
When growing mushrooms, the substrate needs to be sterilized to destroy all competitors in it. This allows the mycelium to colonize the substrate without facing any resistance from evil competitors. Just like you need a mango tree to produce mangos, you need a healthy mycelium to produce mushrooms.
When you need to sterilize your mushroom substrate, you don’t need to own a pressure cooker to make it happen.
The methods below will teach you how to sterilize mushroom substrate without a pressure cooker. But before using any of these methods, cut your straw into small pieces. It is much easier to work with smaller pieces of straw. I will describe six different methods in the next section.
- Heat Pasteurization
- Cold Water Lime Pasteurization
- Tyndallization
- Composting Method
- Scalding Technique
- Hydrogen Peroxide
1. Heat Pasteurization
Pasteurization was discovered in 1863 by Louis Pasteur, a French chemist, and microbiologist. Pasteurization involves applying heat to food and beverages to kill diseases causing bacteria and extend shelf life. It minimizes unwanted competing microorganisms but spares beneficial bacteria in the substrate.
The process of pasteurization involves heating the substrate to 161.06°F for at least one hour. If you exceed this temperature, you risk destroying the good bacteria and allowing the bad guys to thrive.
- Pour hot water into a large pot and boil. Use a thermometer to confirm the temperature.
- Adjust the heat until the temperature reaches 160-170°F. Anything between this temperature range is perfectly okay.
- Put the substrate in a nylon mesh bag and submerge it in the pot.
- Let it stay there for an hour as you monitor the temperature and water levels.
- After 60 minutes, remove the bag from the pot. Put the bag on a strainer for water to drain out and the substrate to cool to room temperature.
Congratulations. You’ve just sterilized your substrate and it is now ready for use. ?
2. Cold Water Lime Pasteurization
The process of sterilizing mushroom substrate with lime and cold water is pretty quick and straightforward. The cold pasteurization method, as the name indicates, doesn’t use heat to eliminate microorganisms. All you need is cold water and some hydrated lime.
During this process, the substrate is soaked in water mixed with hydrated lime. Bacteria and other harmful microorganisms can’t survive in such a hostile alkaline environment.
Precautions
Hydrated lime is a hazardous product that must be used with utmost care. Exposure to dry or wet lime can cause severe chemical burns to the skin and eyes. Always wear a mask, gloves, and glasses when handling hydrated lime.
- Chop the substrate into small pieces.
- Pour cold water into a jar or basin and add approximately 2 grams of hydrated lime per liter of water. The lime will radically increase the PH of water to kill harmful bacteria, mold spores, and other pathogens.
- Add your substrate to the water and stir thoroughly.
- Leave it there for at least 12 hours but not more than 24 hours.
- Remove the substrate from water and leave it on a rack to drain for about 2 hours. The substrate can be contaminated again if left on the rack for more than the recommended time.
- The substrate is ready to be used once it has drained excess water. You can inoculate it with your mushroom spawn.
Note that not all lime products are created equal. Make sure the lime you use is high in calcium and low in magnesium. High levels of magnesium in the substrate will hinder the growth of mycelium.
3. Tyndallization
Tyndallization is an invention born in the 19th century. Renowned Irish physicist John Tyndall independently discovered this sterilization technique. He found out that if a sample is heated at 80-100 degrees Celsius in succession, more stubborn bacteria will die with each heating.
Unlike heat pasteurization, where some germs will survive to fight another day, tyndallization kills everything, including vegetative cells and bacteria spores.
The overall process is very similar to heat pasteurization. The only difference is that the tyndallization technique requires you to repeat the procedure for at least three days. There is a need to be an incubation period in between. So you have to wait 24 hours to repeat the process.
May you Like to Read: Why put aluminum foil balls in slow cooker
4. Composting Method
Composting sterilization is an intricate process that takes up to 14 days for organic material to rot.
Phase 1
You need to mix your substrate with water thoroughly. But this must be done in an external environment under a temperature of up to 75 degrees Celsius.
A very low temperature will hinder the chemical reaction and slow down the composting process. There must be enough oxygen, nitrogen, carbohydrates, and moisture present.
The first phase is considered complete after 7-14 days when the mixture turns black or brown. You may also notice the straws have become soft and flexible.
Phase 2
After 7-14 days, the second phase starts. Take the compost to another room to pasteurize it for about 8 hours at around 55-60 degrees Celsius. After 8 hours, reduce the temperature to 45 degrees Celsius and leave it for 7 days.
This process removes ammonia and volatile organic compounds from the air. After a week, the substrate can be considered sterilized and ready for use.
5. Scalding Technique
Scalding means heating a substance to a close to boiling temperature then cooled. It’s the most frequently used technique of heating milk to denature proteins, deactivate enzymes and kill bacteria. If you want to ensure that you don’t have any bacteria or contaminants lurking in your substrate, scald it.
To scald substrate, heat it in a hot water immersion tub below the boiling point, which is 82.222°C or 180°F.
Let the substrate stay in hot water for at least an hour but not more than 90 minutes.
Before it can be used, let it dry for about 2 hours. Leaving it longer causes contamination to reoccur.
6. Hydrogen Peroxide
The hydrogen Peroxide technique is much less effective than other methods mentioned above. Even so, it is inexpensive and capable of killing a pretty good number of unwanted foreign microorganisms.
- Place your straw in the water and leave it for 60 minutes.
- Remove the straw from the water and drain it. Rinse it with water. Drain once more.
- Put the straw in a bath of water and add hydrogen peroxide. Per every 1 gallon of water, add 1 liter of hydrogen peroxide.
- Leave it there for up to 24 hours.
- Rinse and drain your substrate
What’s Substrate?
Unlike plants, mushrooms don’t obtain nutrients from the soil. They must get it from their diet – decomposing organic matter. This source of nutrients for mushrooms and other fungi is known as substrate. The mycelium of the mushroom thrives through the substrate. Some of the substrates used to grow mushrooms include straws, logs, coffee granules, sawdust, and grains.
Final Thoughts
We’ve shown you how to sterilize mushroom substrate without a pressure cooker. Regardless of the technique you use, sterilizing mushroom substrate is an important step in growing mushrooms.
As we wrap up our discussion on sterilizing mushroom substrate without a pressure cooker, it’s crucial to emphasize the significance of proper sterilization techniques in the cultivation process. The conclusion reiterates the importance of maintaining a sterile environment at all stages, from preparing substrates to inoculating with spawn. Understanding the limitations and risks associated with alternative sterilization methods is key to successful mushroom cultivation.

![16 Best Tabletop Propane Gas Grills 2024: [Also Charcoal & Electric]](https://kitchentechwiz.com/wp-content/uploads/2021/04/Best-Tabletop-Propane-Grill-1.jpg)
Leave a Reply