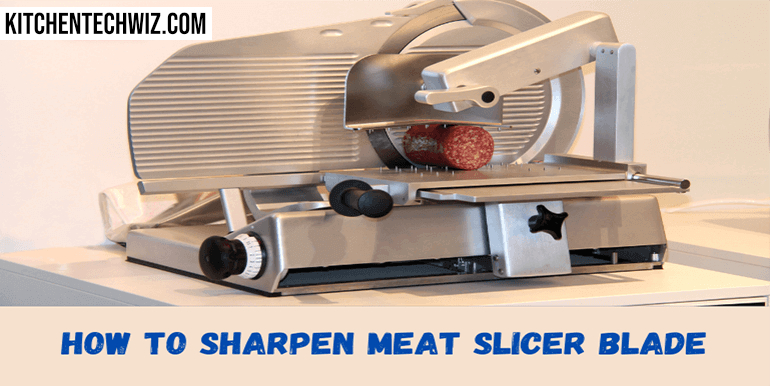
Are you tired of struggling with a dull meat slicer blade that leaves your cuts uneven and ragged? If so, you’re not alone. Whether you’re a professional chef in a bustling restaurant kitchen or just a home cook looking to elevate your culinary skills, maintaining a sharp meat slicer blade is essential for achieving precise and uniform slices of meat, cheese, and other deli items.
Do you know how to sharpen meat slicer blades? A meat slicer, also called a deli slicer, is an excellent investment for anyone who regularly cooks meat products. Apart from meat, it also helps you slice vegetables, fruits, and lots more, on a whim.
It’s perfect if you want to slice your ingredients very thin, which isn’t easy to do with a kitchen knife.
While a meat slicer does a great job in the kitchen, there will always come a time when you need to sharpen it. It will get blunt after days of use and won’t slice precisely.
So we thought it’d be a fantastic idea to do an in-depth article showing how to sharpen meat slicer blade since they are a little trickier to sharpen.
Safety Precautions before Sharpening a Meat Slicer
Before diving headfirst into the main content, you need to learn the safety precautions to take when sharpening blades. Otherwise, you may get seriously injured.
- Running your finger across the cutting edge to test the sharpness of your blade is never a great idea. There are high chances you’ll end up cutting yourself. Get cut-resistant hand gloves to minimize your risk of injury.
- Wear safety goggles to protect your eyes from stone and metal particles when sharpening.
- Work on a clean surface. Make sure the work area is free of clutter.
- Do not remove the blade from the slicer if the device is plugged or connected to the electricity.
- Do not operate or clean a meat slicer blade if you are under 18 years old.
- Use a soft washcloth to clean and wipe the blade after the sharpening process. Proper cleaning of the blade is vital to keeping your budget meat slicer in top shape.
- After cleaning, sanitize the blade to prevent anyone from getting sick. The most effective sanitizer would be alcohol. Hydrogen Peroxide can be used to sterilize slicers as well. Dish soap will only clean the slicer but won’t kill harmful bacteria and microorganisms.
How you Sharpen Meat Slicer Blade
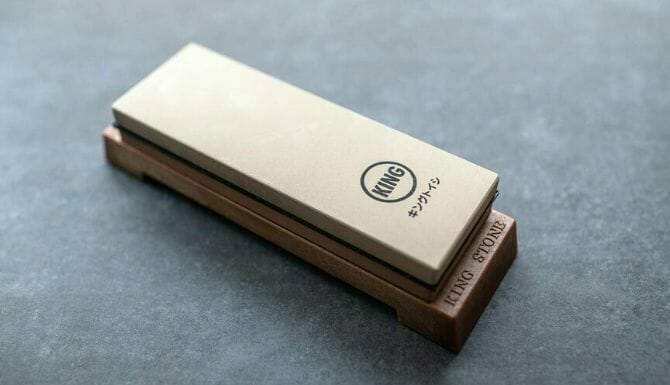
1. Sharpening With a Stone
The most popular way to sharpen a meat slicer blade is a stone. Also known as a whetstone, a sharpening stone is similar to sandpaper. Most deli meat slicers come equipped with a sharpening stone as a package. However, you can still buy them from your favorite online store or local hardware shop.
1. Clean The Blade Thoroughly
Before you begin to sharpen the blade with a stone, make sure the blade is clean. You can clean it with hot, soapy water and then rinse it under flowing water. A clean and dry blade will sharpen easily, while a dirty one will require more work.
2. Lubricate The Stone
Read and understand your slicer’s user manual on how to sharpen it with a stone. Some require lubrication with water or oil.
Be sure to use the right lubricant for maximum efficiency. Lubrication eliminates the “swarf,” the fine debris produced by sharpening. It also simplifies the honing process.
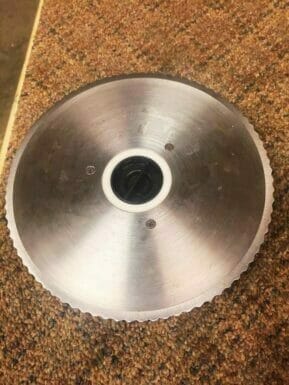
3. Put The Stone On The Slicer And Unscrew The Knob
Confirm that the meat slicer is off. Unplug the power cord. Check on the user manual on how to put the stone of the deli meat slicer safely. Next, find the locking knob. It’s usually located around the base. So you’ll need to take it off with a screw driver.
4. Screw The Knob Back
Place the sharpening stone on the bottom. Fasten the knob back and position the blade on the sharpener. Tightly secure the stone and the blade for efficient results.
5. Turn On The Device
Plug the power cord and turn on the meat slicer to start honing the blade. Wait for the machine to run for about a minute before turning it off. Please, turn it off for a few seconds and repeat the process multiple times until you achieve desired results.
6. Remove The Sharpening Stone
Take off the sharpener locking knob, and pull out the sharpening stone. Return the knob to its place and tighten it.
7. Clean The Blade
Metal particles will usually accumulate on the blade during the sharpening process. Never leave the blade without removing dirt and remains from sharpening.
May You Like: Electric meat grinders for home use
2. How to Sharpen Meat Slicer Blade Manually
You can sharpen the meat slicer blade by hand. A manual sharpener has two parts – a coarse grit and fine grit. You use a course grit to sharpen and a fine grit to polish.
Before you begin to use a sharpening stone, check whether it needs to be submerged in water or lubricated with oil before use.
- Submerge the stone in water and let it remain there for about ten minutes.
- Place the stone on a flat surface, such as on a counter with the course area facing up.
- Place the edge of the meat slicer blade on the stone. Note that the blade should be at the right angle and face away from you.
- To find the correct angle, hold the blade on the dull edge and place your index finger on the flat surface, applying slight pressure.
- Pull the blade toward you on the course surface of the stone in a smooth motion. Repeat this motion up to six times.
- Flip the stone and repeat the steps above apart from submerging the stone in water.
After sharpening the slicer blade, you’ll need to clean it before putting it back to the meat slicer. You want to get rid of any metal or stone particles that were formed whilst sharpening the blade. You can use water and a detergent.
3. How to Sharpen With a Built-In Sharpener
Some deli slicers come equipped with built-in sharpeners. If your slicer has a built-in sharpener, you can follow these steps:
- Switch off the device and unplug the power cord. If you had just used it a few moments ago, give it time to cool down.
- Remove the blade cover and clean the blade. You can refer to the cleaning process above.
- According to the manufacturer’s requirements, you may need to apply water or lubrication.
- Plug the cable into the machine and turn it on. Allow the blade to spin for a few seconds.
- Detach the blade from the machine and clean it thoroughly.
- Attach the blade back to the meat slicer. You are done!
Importance of a sharp meat slicer blade
The importance of a sharp meat slicer blade cannot be overstated when it comes to food preparation and presentation. A sharp blade ensures clean, precise cuts that enhance the texture and flavor of the meat. It also promotes food safety by reducing the risk of jagged edges that can harbor bacteria.
Furthermore, a sharp meat slicer blade improves efficiency in the kitchen, saving time and effort for the operator. With a sharp blade, slicing through tough or delicate meats becomes effortless, resulting in uniform slices that elevate the visual appeal of dishes. Ultimately, a well-maintained meat slicer blade is essential for maintaining high standards in commercial kitchens and ensuring culinary excellence at home.
Testing the Sharpness
Testing the sharpness of a meat slicer blade is essential to ensure precision and efficiency in slicing meats and other foods. One effective way to test the sharpness is by conducting a paper test where you try to slice a piece of thin paper with the blade. If the blade slices through effortlessly without tearing or dragging, it indicates that the blade is sharp. Another method involves using a tomato to gauge the sharpness; a well-sharpened blade will effortlessly slice through the tomato without crushing or squishing it. Additionally, paying attention to how clean and precise the slices are can also serve as an indicator of a razor-sharp blade, as any dullness or imperfections will be immediately noticeable in uneven, ragged slices.
To truly understand and appreciate the importance of testing for sharpness in meat slicer blades, one must consider not only its impact on food quality but also on safety. A dull blade requires more force to cut through food, increasing the risk of accidents and injuries in a commercial kitchen setting. By regularly testing for sharpness and sharpening blades as needed, chefs and kitchen staff can ensure smooth and safe operation while maintaining high standards of food presentation and quality. This highlights the crucial role that regular testing plays in preserving both functionality and safety within professional culinary environments.
In conclusion, regularly testing meat slicer blades for their sharpness is crucial for ensuring optimal performance in food preparation settings.
How to ensure the blade is sharp enough
Ensuring that the blade of your meat slicer is sharp enough is essential for achieving precision and efficiency in slicing. One surefire way to test the sharpness of the blade is to perform a paper test. Simply hold a piece of paper at a 45-degree angle against the blade and gently slide it across. If the blade slices through with minimal resistance, then it’s sharp enough to use. Additionally, visually inspecting the edge of the blade can also give you an idea of its sharpness. A dull blade will have visible nicks and chips, while a sharp one will appear smooth and free from imperfections.
Another key aspect to consider when ensuring your meat slicer’s blade is razor-sharp is regular maintenance. Regularly honing and sharpening the blade using a sharpening stone or professional sharpening service can help prolong its lifespan and ensure optimal performance. It’s also important to clean and dry the blade thoroughly after each use to prevent corrosion or dulling caused by food residue or moisture buildup. By staying proactive with maintenance, you’ll guarantee that your meat slicer’s blade remains in top-notch condition for consistently superb slicing results.
In conclusion, keeping track of your meat slicer’s blade sharpness through simple tests like the paper test and regular visual inspection can help maintain its effectiveness in cutting meat efficiently. Emphasizing routine maintenance by honing, sharpening, cleaning, and drying will not only extend the life of the blade but also ensure consistent quality in every slice.
Tips on maintaining a sharp blade
Maintaining a sharp blade on your meat slicer is crucial for ensuring precision and efficiency in food preparation. One essential tip to keep your blade sharp is regular honing with a sharpening steel. This process helps realign the edge of the blade, keeping it straight and sharp. Additionally, using a high-quality cutting board made of materials like bamboo or wood can help preserve the sharpness of your blade by reducing wear and tear.
Another important aspect of maintaining a sharp blade is proper cleaning and storage. After each use, make sure to clean the blade thoroughly with warm, soapy water and dry it properly before storing it. Additionally, storing the meat slicer in a dry environment away from moisture will prevent rust and corrosion, which can dull the blade over time. By following these maintenance tips diligently, you can ensure that your meat slicer remains razor-sharp for efficient slicing every time.
Storing the Meat Slicer
Once you’ve sharpened, honed, and cleaned your meat slicer blade, store it in a safe place, so it stays immaculate for long. You can store it regardless of whether it’s assembled or dissembled. The most important thing is to ensure the blade is secured and protected. Keep it in a dry place and away from children.
May You Like: Gifts for grillers and smokers
Final Thoughts
Above, we’ve provided you with the best methods on how to sharpen meat slicer blade. All these methods are 100% safe and won’t do any harm to your meat slicer blade. If you have any questions, let us know in the comments.

![16 Best Tabletop Propane Gas Grills 2024: [Also Charcoal & Electric]](https://kitchentechwiz.com/wp-content/uploads/2021/04/Best-Tabletop-Propane-Grill-1.jpg)
Leave a Reply