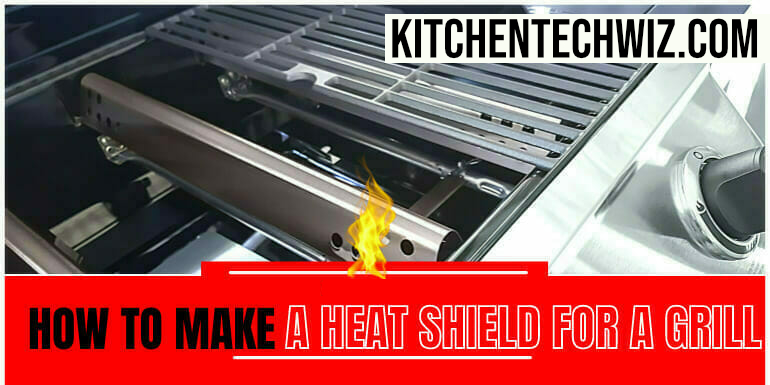
Are you tired of unevenly cooked food and flare-ups ruining your grilling experience? If so, it might be time to consider building a custom heat shield for your grill. A heat shield not only helps distribute heat more evenly across the cooking surface but also prevents grease fires and reduces the chances of charring your food beyond recognition.
Grilling is an excellent way to enjoy the summer, but it can also cause mood swings. The grill can get hot, so it’s essential to keep the hot sides of the grill away from the foods you are cooking. The high heat can cause food to ignite, which leads to smoke inhalation and even burns. With a heat shield for your grill, you can protect yourself and your food.
One way you can prevent this is by making a heat shield for your grill. It will not only keep your food safe from the direct heat of the grill, but it will also protect you. A heat shield is a metal cover placed over the grill while cooking to protect food from the heat and flames. It allows for more flavor and prevents food from getting overcooked. Fortunately, it is an easy project for anyone with essential tools and skills to make on their own. In this article, you’ll learn how to make a heat shield for a grill.
What Is A Grill Heat Shield, And What Does It Do?
Grill heat shields are an essential accessory for anyone who grills. A grill has trouble maintaining a specific temperature when it becomes too hot outside. Hence, the shield helps with the cooling process. Heat shields also help protect food from falling into the flames of the grill, which can ruin your barbecue! There are several different types of heat shields that you can use to experiment with what works best for you.
Many different things can lead to a fire. When grilling, it is crucial to protect the grill area from the heat. A heat shield is an object with a high thermal mass absorbing that heat and then dissipating it. It helps prevent the grill from getting too hot and catching on fire. A heat shield can be made out of various materials like steel, aluminum, brick or stone, cast-iron, chrome plated steel.
Things You Will Need To Make a Heat Shield For The Grill.
you can use many materials to build a heat shield, including:
- Measurement tape.
- Corrugated metal.
- Stainless steel, aluminum foil.
- Stainless Steel Screw.
- A hammer.
- Circular saw.
- Steel Cutter.
- Drill machine.
- Holders.
- Rivets gun.
- Welding machine.
How To Make Heat Shield For A Grill
Here is some step to make a heat shield for the grill:
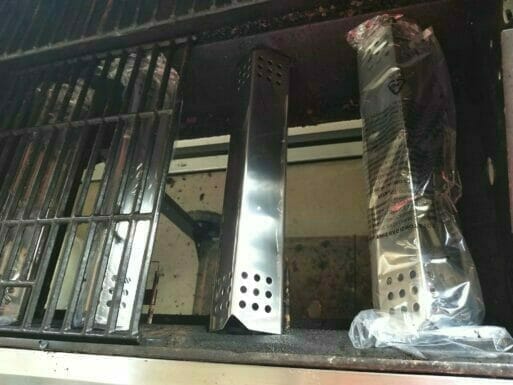
1. Take Out And Clean The Grill Parts:
Take your grill to the open place. After grilling, you need to wait one hour for cooling. After cooling, You have to take out the grill plate no matter what grill you use as gas or charcoal. You can use vinegar to clean up the parts. You will also need detergent and freshwater for cleaning.
2. Measuring The Size Of Grill Burner:
You are entering the most crucial part of this process. Take a measuring tape or scale and measure around the burner. The burner is covered by a heat shield that spreads evenly to keep it at a steady temperature. If you have many grills, measure them separately and make a separate shield because a shield is usable for a grill.
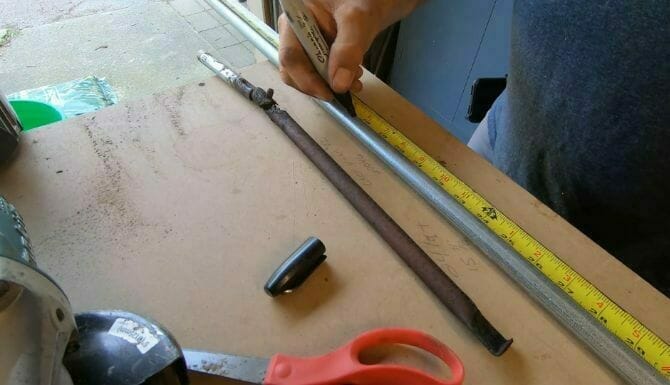
You must measure the height and width of the grill burner.
3. Create e Design Of a Heat Shield
Easy to design a heat shield. You can create straight lines for each burner. Check the size of the steel to see if it will work with your burner. If necessary, try to keep the burner 2-4 inches high with or without it.
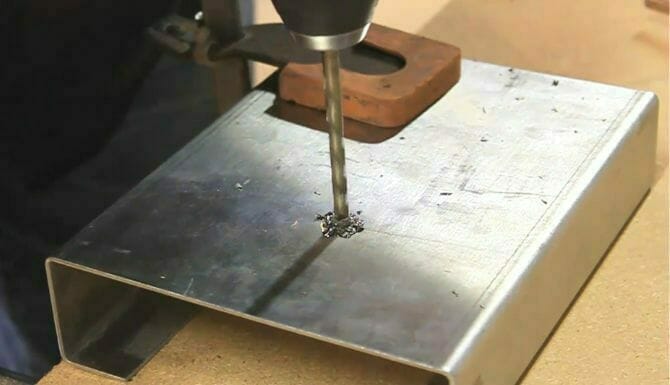
4. Cut The Material
Cut the steels to size after taking the stain with the marker on the steel according to the size. Then cut to size with a steel cutter or with the chop saw. Once you make a mistake, you will discard that steel sheet. So draw a line on the size and cut evenly with a chop saw. It is effortless to cut steel sheets with a chop saw.
5. Bend The Still
After cutting the steel materials, you will see them flat. To give it a curve shape, use something that can hold one side of your bent piece and then bend the other side. This project holder will use to hold one side while bending the other for more. You can also use a hammer to bend the steel materials.
6. Welding
After bending the steel materials, you can weld them together. You can do it manually or by machine. If you choose manual welding, you need a welding machine, welding torch, welding rod, welding gloves and a welding table. After setting up these materials, you can start welding the steel materials.
7. Drill Holes And Attach The Heat Shield
Drill holes with the drill machine at various sides of the grill. Start with two holes at each side of the grill, then go up to three holes at each side of the grill. Add some at the front of the grill and some at the back of the grill. Be sure to drill and tap the holes in the grates of the grill. You can use a hammer to tap the holes, but a drill is safer and more precise. The holes should be placed in the right proximity. Now insert the screws in the heat shield in those holes.
8. Place The Heat Shield On Burner
Now, place the heat shield on the grill. The holes should be opposite each other. It means screws that have been placed in the front holes of the grill should be placed in the back holes of the grill. It is not a simple task, so take your time and do it right. Check if the shield is perfect enough to cover the entire burner.
You can do this with the help of a wooden stick. The stick should be of an appropriate thickness that you can slide through the grill. Now, move the stick to the front and back of the grill and see any holes left. If not, you are good to go. Now, these screws would hold the entire grill.
9. Screw Up The Shield
You can screw the shield up. If you are not careful, you might break the screws on the shield. So, make sure not to apply too much force in screwing them up. Place the screws in their holes and tighten the screw until it feels snug. You can use a screw gun to attach the screw well. With a screw gun, you can easily tightly insert the screw. In this case, you do not need an annoying wrench.
Now your grill shield is ready. Now you try.
Materials For Making Heat Shield
1. Stainless Steel
Stainless steel is the most common material used for making heat shields that are attached to grills. In this case, the Stainless Steel is less prone to rust. You can easily find this steel in any hardware store. These are the best and easiest ways to make a heat shield for your grill.
2. Cast-Iron
Cast Iron is also a perfect material that is used to make heat shields for grills. Cast iron is made by heating the Iron, and then it is hammered into shape. It is strong and can withstand a lot of heat. It makes it a good material for making a grill shield.
3. Ceramic
Ceramic is a material that you can use to make heat shields for grills. These materials are made from hard soil like clay. They are also strong and can withstand a lot of heat. Ceramic heat shields are pretty standard. They are dishwasher safe and can be cleaned in the dishwasher.
4. Porcelain-Coated Steel
Porcelain-coated steel is a type of steel that is known for its high heat and longevity. This steel is a low-tech heat shield for grills. It is made from steel, and it is coated with porcelain. This porcelain is a very tough ceramic material that is used to coat steel. It can withstand high temperatures. It is an excellent material to use because it is lightweight and easy to carry.
5. Chrome-Plated Steel
Chrome-plated steel is a more expensive heat shield for grills. It is made from steel. The chrome plating is added to the steel to make it even more durable. This heat shield is also dishwasher safe.
Safety Instructions While Constructing A Heat Shield
For grills, You should take precautions while making a heat shield for grills. Precautions to take while making a heat shield are bellowed:
- You need to use a safety kit to make the grill shield.
- It would help if you collected the metal of your choice to make the shield. Such as Aluminum Stainless Steel, Cast-Iron, Ceramic, Porcelain-coated steel, Chrome-plated steel.
- You will need measurement scales, markers, drill machines, welding machines, hammers, screws, angles, holders, etc.
- Please do not cut the heat shield in a Non-parallel place; you should cut it on the parallel ground and a welding table.
- There should be no direct contact between the heat source and the heat shield.
- Should ensure that the heat shield is completely covering the grill.
- You must always wear goggles to protect the eyes from metal cutting and prevent shrapnel from getting into your eyes.
- You should not do the project while your grill is still hot. Always wait for at least two hours after you finish cooking on it.
- The heat shield should be firmly fixed to the grill.
- Protect your hands by wearing welding gloves. Because you will cut the steel, mark it, welding, attach it to the burner again and again to know the correct size. It can cut your hand, and it can burn also.
- The heat source should be at the bottom of the grill, under the heat shield.
- The heat shield should not be placed on the metal grill.
Benefits Of Using A Heat Shield?
There are many benefits to using a heat shield on the grill.
- It prevents the rest of the grate from turning red-hot.
- It prevents the food from sticking to the heating surface of the grill.
- You cannot directly combine foods with fire.
- Can protect the vegetables and the meats from direct heat.
- It makes the food taste better when grilled.
- Can Protect the food from overheating.
- Will protect your hands from burns.
- It Makes the grill cleaner.
- The grill is safer to use.
- It makes the grill more efficient.
- It prevents burns on food.
How To Use A Grill Heat Shield?
- Clean the grill, grate and grill shield well.
- Put the food on the grill shield.
- Close the grill lid.
- Wait for the food to cook.
- When the food is done, remove the grill shield and serve.
How To Clean A Grill Heat Shield?
Cleaning your grill heat shields is very simple. Please follow the method:
- Please put them in the sink and soak them in water for a few hours.
- Wet it with water to remove food debris.
- Scrub them with a sponge.
- Brush your grill shield with a clean, soft rag.
- Discard the dirty rag and use a clean one.
- Rinse well.
- Wipe it clean with a wet paper towel.
- Let them dry in the sun.
Testing and Adjusting
Once the heat shield for your grill has been fabricated, it’s crucial to test and adjust it to ensure optimal performance. Start by placing the heat shield in the grill and firing it up to gauge its effectiveness in distributing and retaining heat. Take note of any uneven heating patterns or hot spots, as these can lead to unevenly cooked food. To address these issues, you may need to make adjustments by altering the positioning of the shield or modifying its design.
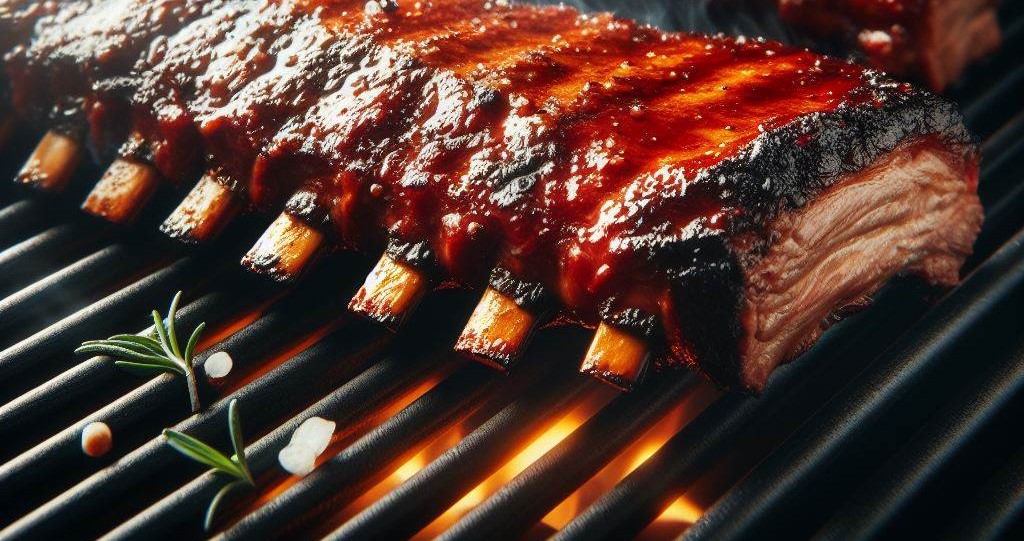
Additionally, consider testing different cooking methods with the heat shield in place to see how it affects grilling outcomes. Whether you’re searing steaks, slow-cooking ribs, or smoking meats, observing how the heat shield impacts each technique will help fine-tune its functionality. It’s essential to maintain a balance between direct and indirect heat for versatile cooking options. By testing and adjusting your homemade heat shield, you can tailor it to meet your specific grilling needs and elevate the quality of your culinary creations.
Conclusion
The method that I’ve taught you is not complex at all. If you have a grill, you can make a grill shield at home. It is an effortless way to make your grill work better and to cook on it better.
In this article, I have mentioned what kind of material and tools to collect. I have outlined the exact plan for the process. Then I described how it should be used, cleaned and maintained. I hope you follow my steps and make a grill shield at home, and if you follow my suggestion, it will be long-lasting.
It’s clear that ensuring safe and efficient grilling is essential for a successful outdoor cooking experience. By understanding the importance of using a heat shield for your grill, you can protect your food from flare-ups and uneven heating while also mitigating potential fire hazards. Additionally, implementing a well-designed heat shield can prolong the life of your grill by reducing exposure to extreme heat and minimizing wear and tear on sensitive components.
I hope this article will help you. If you have any questions about these instructions, please feel free to leave a comment, and I will reply to you as soon as possible. ✌️

![16 Best Tabletop Propane Gas Grills 2024: [Also Charcoal & Electric]](https://kitchentechwiz.com/wp-content/uploads/2021/04/Best-Tabletop-Propane-Grill-1.jpg)
Leave a Reply