
Yes, replacing a kitchen faucet can be a relatively simple DIY project for many homeowners.
From choosing the right type of faucet to understanding the tools needed, we’ve got you covered. If you’re dealing with a leaky faucet, an outdated style, or simply want to refresh the look of your kitchen, replacing a faucet is a practical and cost-effective solution.
In this guide, we will walk you through the steps and provide tips to make the process easier.
Can I install a faucet myself?
Yes, you can install a faucet yourself if you have the necessary tools and knowledge. It can be a DIY project that saves you money on hiring a professional plumber. However, it’s important to note that if you’re not confident in your abilities or if the installation involves complex plumbing work, it may be safer to hire a licensed plumber.
What to Know Before Installing a Replacement Faucet?
Installing a replacement faucet can be a relatively straightforward DIY project if you have the right tools and a basic understanding of plumbing. Before you begin, there are a few important things to consider. Here’s what you need to know before you install a replacement faucet.
1. Type of faucet: There are several types of faucets available, including single-handle, double-handle, wall-mounted, and deck-mounted faucets. Make sure you choose a replacement faucet that matches the existing setup in your kitchen or bathroom.
2. Number of holes: Take note of the number of holes in your sink or countertop. This will determine the type of faucet you can install. Common options are one-hole, three-hole, or two-handle faucets, but there are also options available for sinks with extra holes.
3. Water supply lines: Before you start the installation process, shut off the water supply to the sink. You can usually do this by turning off the shutoff valves located under the sink. If there are no shutoff valves, you may need to turn off the main water supply to your home.
4. Extra holes: If your replacement faucet requires fewer holes than your existing setup, you may need to cover the extra holes with a deck plate or escutcheon plate. These plates can be purchased separately.
5. Tools: Gather the necessary tools for the installation, such as an adjustable wrench, basin wrench, pair of pliers, putty knife, and socket wrench. These tools will help you remove the old faucet and install the new one.
6. Safety precautions: When working with plumbing, it’s important to wear safety glasses to protect your eyes. Additionally, make sure to follow proper safety procedures to avoid any accidents.
7. Plumbing skills: Evaluate your plumbing skills and determine if you feel comfortable tackling this project on your own. If you’re unsure or don’t have experience with plumbing tasks, it may be best to hire a professional plumber to ensure the installation is done correctly.
8. Cost considerations: While installing a replacement faucet yourself can save you money on labor costs, there may be additional expenses such as purchasing special tools or additional plumbing elements. Consider the overall cost of the project before you start.
Read: What is The Best Material for Kitchen Faucets: Expert Guides
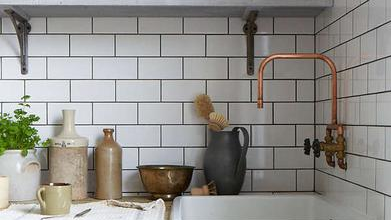
How to Remove a Kitchen Faucet?
Removing a faucet may seem like a daunting task, but with the right tools and steps, it can be a relatively straightforward process. Here is a step-by-step guide on how to remove a faucet:
/remove-a-kitchen-faucet-2718825-05-b97ce3cfdc0f4c1f98036293448e122d.jpg)
Turn off the water supply
Locate the shutoff valves under the sink. These valves are usually found near the wall or on the water lines leading into the faucet. Turn the valves clockwise until they are fully closed to shut off the water supply. This step is crucial to prevent any water leakage during the removal process.
Disconnect the water supply lines
Use a pair of adjustable wrenches to loosen and disconnect the water supply lines from the faucet. One wrench should be used to hold the valve in place while the other is used to loosen the nut connecting the supply line to the valve. Be prepared to catch any small amount of water that may drip out after disconnecting the lines. It’s also a good idea to place a bucket or towel underneath the connections to catch any excess water.
Remove the deck plate or escutcheon
Some faucets come with a deck plate or escutcheon that covers extra holes in the sink. If your faucet has this plate, use a screwdriver to unscrew it from underneath the countertop or sink. This will expose the nuts securing the faucet in place.
Disconnect the sprayer hose (if applicable)
If your kitchen faucet has a separate sprayer hose, locate the connection point between the sprayer hose and the faucet body. Use pliers to unscrew the coupling and detach the sprayer hose from the faucet. Before removing the sprayer hose, make sure any residual water is drained from the hose to prevent water leakage.
Loosen the faucet nuts
Underneath the sink, locate the nuts that hold the faucet in place. These nuts are typically found on the threaded studs at the base of the faucet. Use a wrench or pliers to loosen and remove these nuts by rotating them counterclockwise. Take care not to damage any nearby pipes, connections, or seals as you remove the nuts.
Lift the faucet off the sink
Once the nuts have been removed, you can gently lift the faucet off the sink. There may be some residual water in the faucet body that can spill out, so be cautious while removing it. Lift straight up to avoid damaging the sink or any other components.
Clean the sink surface
After the faucet has been removed, take the opportunity to clean the sink surface thoroughly. This includes removing any residue, old caulk, or dirt. A putty knife can be used to scrape away any stubborn residue, and a mild cleaner can be used to wipe down the surface. Ensure the sink surface is completely dry before installing a new faucet.
Read: How to Remove Kitchen Faucet without Basin Wrench [5 Quick Steps]
Tools and Materials Needed
If you’re looking to remove an old kitchen faucet and install a new one yourself, there are several tools and materials you’ll need to have on hand. Here is a list of the essentials:
| Old Faucet Removal | DIY Faucet Installation |
| Adjustable wrench | New kitchen faucet |
| Basin wrench | Water supply lines (typically included) |
| Pair of pliers | Deck plate (if necessary) |
| Putty knife | Soap dispenser (if desired) |
| Safety glasses | Plumbers putty (if needed for seal) |
| Masking tape | Teflon tape |
| Plumber’s wrench or pipe wrench (for tight connections) | Bucket or towel for excess water |
| Bucket (to catch water during removal) | Plumber’s tape (for threaded connections) |
| Old rags or towels (for cleanup) | Adjustable wrench or basin wrench |
| Plunger (for any unexpected clogs) | |
| Flashlight (for better visibility in tight spaces |
How to Do DIY Faucet Installation?
Replacing a kitchen faucet can be a relatively simple DIY project with the right tools and some basic knowledge. Here are the steps to replace a kitchen faucet:
Step 1: Inspect the sink area
Make sure the sink is clean and free of any dirt or old caulk. A smooth surface will help with installing the new faucet securely.
Step 2: Check for additional requirements
Read the instructions that came with your new faucet. Check if you need any extra tools or materials for the installation. Make sure you have everything you need before starting.
Step 3: Measure and confirm hole spacing
Measure the distance between the holes in your sink to match the specifications of your new faucet. This is important for a proper fit, especially if you have a faucet with a deck plate.
Step 4: Apply plumber putty or sealant (if needed)
If your new faucet needs a sealant or plumber putty for a watertight seal, follow the manufacturer’s instructions. This is usually necessary for faucets with separate components or single-hole faucets.
Step 5: Organize tools and materials
Lay out all the tools and materials needed for the installation. This includes the new faucet, water supply lines, deck plate (if applicable), and any additional components. Being organized will make the installation easier.
Step 6: Prepare water supply lines
If the water supply lines are not already attached to the faucet, connect them securely. Use Teflon tape on the threaded ends for an extra layer of sealant. Make sure the connections are tight but not too tight.
Step 7: Position the faucet
Place the new faucet into the mounting holes on the sink. Make sure it is aligned properly and fits securely. If your faucet has a deck plate, position it over the holes before securing the faucet.
Step 8: Secure the faucet
Tighten the nuts or screws underneath the sink to secure the faucet in place. Follow the manufacturer’s guidelines for the specific tightening sequence and torque.
Step 9: Connect water supply lines
Reconnect the water supply lines to the corresponding hot and cold water valves. Use adjustable wrenches to ensure tight connections. Check for any leaks by turning on the water supply briefly.
Step 10: Check for proper functionality
Test the new faucet. Turn on both hot and cold water to check for proper water flow and temperature. Activate any additional features such as sprayers or soap dispensers to ensure they work correctly.
FAQs
How long will it take to install the faucet?
Installing a faucet typically takes 30-60 minutes, depending on your experience and the type of faucet.
Do I Need to Hire a Plumber to Replace a Faucet?
No, hiring a plumber is not necessary for a faucet replacement; it’s a DIY-friendly task with available step-by-step guides.
What are the most common issues when it comes to faucets?
Common faucet issues include leaks, low water pressure, and dripping. Regular cleaning can prevent many problems.
How often should a faucet be replaced?
Faucets can last 15-20 years, but consider replacement if facing frequent issues or an outdated design.
Is replacing a kitchen faucet with a sprayer easy?
Yes, replacing a faucet with a sprayer is straightforward; follow the instructions carefully for a smooth process.
How to replace a kitchen faucet with two handles?
To replace a faucet with two handles, turn off the water supply, disconnect the old faucet, and install the new one following the instructions.
Read: How Long Do Kitchen Faucets Last?
Conclusion
Replacing a kitchen faucet is a task that can be relatively easy to accomplish, even for someone with limited plumbing experience. With the right tools and a step-by-step guide, you can successfully upgrade your kitchen sink with a brand-new faucet. However, it is always advisable to assess your own skill level and comfort level with DIY projects before diving in. If you feel unsure or overwhelmed, don’t hesitate to call in a professional plumber who can handle the job swiftly and efficiently.

![16 Best Tabletop Propane Gas Grills 2024: [Also Charcoal & Electric]](https://kitchentechwiz.com/wp-content/uploads/2021/04/Best-Tabletop-Propane-Grill-1.jpg)

Leave a Reply